A Guide to MoonBit Python Integration
Introduction
Python, with its concise syntax and vast ecosystem, has become one of the most popular programming languages today. However, discussions around its performance bottlenecks and the maintainability of its dynamic typing system in large-scale projects have never ceased. To address these challenges, the developer community has explored various optimization paths.
The python.mbt tool, officially launched by MoonBit, offers a new perspective. It allows developers to call Python code directly within the MoonBit environment. This combination aims to merge MoonBit's static type safety and high-performance potential with Python's mature ecosystem. Through python.mbt, developers can leverage MoonBit's static analysis capabilities, modern build and testing tools, while enjoying Python's rich library functions, making it possible to build large-scale, high-performance system-level software.
This article aims to delve into the working principles of python.mbt and provide a practical guide. It will answer common questions such as: How does python.mbt work? Is it slower than native Python due to an added intermediate layer? What are its advantages over existing tools like C++'s pybind11 or Rust's PyO3? To answer these questions, we first need to understand the basic workflow of the Python interpreter.
How the Python Interpreter Works
The Python interpreter executes code in three main stages:
-
Parsing: This stage includes lexical analysis and syntax analysis. The interpreter breaks down human-readable Python source code into tokens and then organizes these tokens into a tree-like structure, the Abstract Syntax Tree (AST), based on syntax rules.
For example, for the following Python code:
def add(x, y):
  return x + y

a = add(1, 2)
print(a)
We can use Python's
astmodule to view its generated AST structure:Module( body=[ FunctionDef( name='add', args=arguments( args=[ arg(arg='x'), arg(arg='y')]), body=[ Return( value=BinOp( left=Name(id='x', ctx=Load()), op=Add(), right=Name(id='y', ctx=Load())))]), Assign( targets=[ Name(id='a', ctx=Store())], value=Call( func=Name(id='add', ctx=Load()), args=[ Constant(value=1), Constant(value=2)])), Expr( value=Call( func=Name(id='print', ctx=Load()), args=[ Name(id='a', ctx=Load())]))]) -
Compilation: Next, the Python interpreter compiles the AST into a lower-level, more linear intermediate representation called bytecode. This is a platform-independent instruction set designed for the Python Virtual Machine (PVM).
Using Python's
dismodule, we can view the bytecode corresponding to the above code:2 LOAD_CONST 0 (<code object add>) MAKE_FUNCTION STORE_NAME 0 (add) 5 LOAD_NAME 0 (add) PUSH_NULL LOAD_CONST 1 (1) LOAD_CONST 2 (2) CALL 2 STORE_NAME 1 (a) 6 LOAD_NAME 2 (print) PUSH_NULL LOAD_NAME 1 (a) CALL 1 POP_TOP RETURN_CONST 3 (None) -
Execution: Finally, the Python Virtual Machine (PVM) executes the bytecode instructions one by one. Each instruction corresponds to a C function call in the CPython interpreter's underlying layer. For example,
LOAD_NAMElooks up a variable, andBINARY_OPperforms a binary operation. It is this process of interpreting and executing instructions one by one that is the main source of Python's performance overhead. A simple1 + 2operation involves the entire complex process of parsing, compilation, and virtual machine execution.
Understanding this process helps us grasp the basic approaches to Python performance optimization and the design philosophy of python.mbt.
Paths to Optimizing Python Performance
Currently, there are two mainstream methods for improving Python program performance:
- Just-In-Time (JIT) Compilation: Projects like PyPy analyze a running program and compile frequently executed "hotspot" bytecode into highly optimized native machine code, thereby bypassing the PVM's interpretation and significantly speeding up computationally intensive tasks. However, JIT is not a silver bullet; it cannot solve the inherent problems of Python's dynamic typing, such as the difficulty of effective static analysis in large projects, which poses challenges for software maintenance.
- Native Extensions: Developers can use languages like C++ (with
pybind11) or Rust (withPyO3) to directly call Python functions or to write performance-critical modules that are then called from Python. This method can achieve near-native performance, but it requires developers to be proficient in both Python and a complex system-level language, presenting a steep learning curve and a high barrier to entry for most Python programmers.
python.mbt is also a native extension. But compared to languages like C++ and Rust, it attempts to find a new balance between performance, ease of use, and engineering capabilities, with a greater emphasis on using Python features directly within the MoonBit language.
- High-Performance Core: MoonBit is a statically typed, compiled language whose code can be efficiently compiled into native machine code. Developers can implement computationally intensive logic in MoonBit to achieve high performance from the ground up.
- Seamless Python Calls:
python.mbtinteracts directly with CPython's C-API to call Python modules and functions. This means call overhead is minimized, bypassing Python's parsing and compilation stages and going straight to the virtual machine execution layer. - Gentler Learning Curve: Compared to C++ and Rust, MoonBit's syntax is more modern and concise. It also has comprehensive support for functional programming, a documentation system, unit testing, and static analysis tools, making it more friendly to developers accustomed to Python.
- Improved Engineering and AI Collaboration: MoonBit's strong type system and clear interface definitions make code intent more explicit and easier for static analysis tools and AI-assisted programming tools to understand. This helps maintain code quality in large projects and improves the efficiency and accuracy of collaborative coding with AI.
Using Pre-wrapped Python Libraries in MoonBit
To facilitate developer use, MoonBit will officially wrap mainstream Python libraries once the build system and IDE are mature. After wrapping, users can use these Python libraries in their projects just like importing regular MoonBit packages. Let's take the matplotlib plotting library as an example.
First, add the matplotlib dependency in your project's root moon.pkg.json or via the terminal:
moon update
moon add Kaida-Amethyst/matplotlib
Then, declare the import in the moon.pkg.json of the sub-package where you want to use the library. Here, we follow Python's convention and set an alias plt:
{
  "import": [
    {
      "path": "Kaida-Amethyst/matplotlib",
      "alias": "plt"
    }
  ]
}
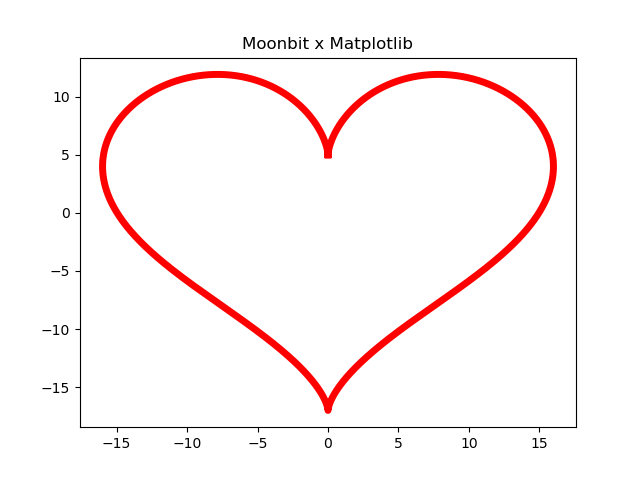
After configuration, you can call matplotlib in your MoonBit code to create plots:
let sin : (Double) -> Double = @math.sin

fn main {
  let x = Array::makei(100, fn(i) { i.to_double() * 0.1 })
  let y = x.map(sin)

  // To ensure type safety, the wrapped subplots interface always returns a tuple of a fixed type.
  // This avoids the dynamic behavior in Python where the return type depends on the arguments.
  let (_, axes) = plt::subplots(1, 1)

  // Use the .. cascade call syntax
  axes[0][0]
  ..plot(x, y, color = Green, linestyle = Dashed, linewidth = 2)
  ..set_title("Sine of x")
  ..set_xlabel("x")
  ..set_ylabel("sin(x)")

  @plt.show()
}
Currently, on macOS and Linux, MoonBit's build system can automatically handle dependencies. On Windows, users may need to manually install a C compiler and configure the Python environment. Future MoonBit IDEs will aim to simplify this process.
Using Unwrapped Python Modules in MoonBit
The Python ecosystem is vast, and even with AI technology, relying solely on official wrappers is not realistic. Fortunately, we can use the core features of python.mbt to interact directly with any Python module. Below, we demonstrate this process using the simple time module from the Python standard library.
Introducing python.mbt
First, ensure your MoonBit toolchain is up to date, then add the python.mbt dependency:
moon update
moon add Kaida-Amethyst/python
Next, import it in your package's moon.pkg.json:
{
  "import": ["Kaida-Amethyst/python"]
}
python.mbt automatically handles the initialization (Py_Initialize) and shutdown of the Python interpreter, so developers don't need to manage it manually.
Importing Python Modules
Use the @python.pyimport function to import modules. To avoid performance loss from repeated imports, it is recommended to use a closure technique to cache the imported module object:
// Define a struct to hold the Python module object for enhanced type safety
pub struct TimeModule {
  time_mod: PyModule
}

// Define a function that returns a closure for getting a TimeModule instance
fn import_time_mod() -> () -> TimeModule {
  // The import operation is performed only on the first call
  guard @python.pyimport("time") is Some(time_mod) else {
    println("Failed to load Python module: time")
    panic("ModuleLoadError")
  }
  let time_mod = TimeModule::{ time_mod }
  // The returned closure captures the time_mod variable
  fn () { time_mod }
}

// Create a global time_mod "getter" function
let time_mod: () -> TimeModule = import_time_mod()
In subsequent code, we should always call time_mod() to get the module, not import_time_mod.
Converting Between MoonBit and Python Objects
To call Python functions, we need to convert between MoonBit objects and Python objects (PyObject).
-
Integers: Use
PyInteger::fromto create aPyIntegerfrom anInt64, andto_int64()for the reverse conversion.test "py_integer_conversion" { let n: Int64 = 42 let py_int = PyInteger::from(n) inspect(py_int, content="42") assert_eq(py_int.to_int64(), 42L) } -
Floats: Use
PyFloat::fromandto_double.test "py_float_conversion" { let n: Double = 3.5 let py_float = PyFloat::from(n) inspect(py_float, content="3.5") assert_eq(py_float.to_double(), 3.5) } -
Strings: Use
PyString::fromandto_string.test "py_string_conversion" { let py_str = PyString::from("hello") inspect(py_str, content="'hello'") assert_eq(py_str.to_string(), "hello") } -
Lists: You can create an empty
PyListandappendelements, or create one directly from anArray[&IsPyObject].test "py_list_from_array" { let one = PyInteger::from(1) let two = PyFloat::from(2.0) let three = PyString::from("three") let arr: Array[&IsPyObject] = [one, two, three] let list = PyList::from(arr) inspect(list, content="[1, 2.0, 'three']") } -
Tuples:
PyTuplerequires specifying the size first, then filling elements one by one using thesetmethod.test "py_tuple_creation" { let tuple = PyTuple::new(3) tuple ..set(0, PyInteger::from(1)) ..set(1, PyFloat::from(2.0)) ..set(2, PyString::from("three")) inspect(tuple, content="(1, 2.0, 'three')") } -
Dictionaries:
PyDictmainly supports strings as keys. Usenewto create a dictionary andsetto add key-value pairs. For non-string keys, useset_by_obj.test "py_dict_creation" { let dict = PyDict::new() dict ..set("one", PyInteger::from(1)) ..set("two", PyFloat::from(2.0)) inspect(dict, content="{'one': 1, 'two': 2.0}") }
When getting elements from Python composite types, python.mbt performs runtime type checking and returns an Optional[PyObjectEnum] to ensure type safety.
test "py_list_get" {
  let list = PyList::new()
  list.append(PyInteger::from(1))
  list.append(PyString::from("hello"))

  inspect(list.get(0).unwrap(), content="PyInteger(1)")
  inspect(list.get(1).unwrap(), content="PyString('hello')")
  inspect(list.get(2), content="None") // Index out of bounds returns None
}
Calling Functions in a Module
Calling a function is a two-step process: first, get the function object with get_attr, then execute the call with invoke. The return value of invoke is a PyObject that requires pattern matching and type conversion.
Here is the MoonBit wrapper for time.sleep and time.time:
// Wrap time.sleep
pub fn sleep(seconds: Double) -> Unit {
  let lib = time_mod()
  guard lib.time_mod.get_attr("sleep") is Some(PyCallable(f)) else {
    println("get function `sleep` failed!")
    panic()
  }
  let args = PyTuple::new(1)
  args.set(0, PyFloat::from(seconds))
  match (try? f.invoke(args)) {
    Ok(_) => Ok(())
    Err(e) => {
      println("invoke `sleep` failed!")
      panic()
    }
  }
}

// Wrap time.time
pub fn time() -> Double {
  let lib = time_mod()
  guard lib.time_mod.get_attr("time") is Some(PyCallable(f)) else {
    println("get function `time` failed!")
    panic()
  }
  match (try? f.invoke()) {
    Ok(Some(PyFloat(t))) => t.to_double()
    _ => {
      println("invoke `time` failed!")
      panic()
    }
  }
}
After wrapping, we can use them in a type-safe way in MoonBit:
test "sleep" {
  let start = time().unwrap()
  sleep(1)
  let end = time().unwrap()

  println("start = \{start}")
  println("end = \{end}")
}
Practical Advice
-
Define Clear Boundaries: Treat
python.mbtas the "glue layer" connecting MoonBit and the Python ecosystem. Keep core computation and business logic in MoonBit to leverage its performance and type system advantages, and only usepython.mbtwhen necessary to call Python-exclusive libraries. -
Use ADTs Instead of String Magic: Many Python functions accept specific strings as arguments to control behavior. In MoonBit wrappers, these "magic strings" should be converted to Algebraic Data Types (ADTs), i.e., enums. This leverages MoonBit's type system to move runtime value checks to compile time, greatly enhancing code robustness.
-
Thorough Error Handling: The examples in this article use
panicor return simple strings for brevity. In production code, you should define dedicated error types and pass and handle them through theResulttype, providing clear error context. -
Map Keyword Arguments: Python functions extensively use keyword arguments (kwargs), such as
plot(color='blue', linewidth=2). This can be elegantly mapped to MoonBit's Labeled Arguments. When wrapping, prioritize using labeled arguments to provide a similar development experience.For example, a Python function that accepts
kwargs:# graphics.py def draw_line(points, color="black", width=1): # ... drawing logic ... print(f"Drawing line with color {color} and width {width}")Its MoonBit wrapper can be designed as:
fn draw_line(points: Array[Point], color~: Color = Black, width: Int = 1) -> Unit { let points : PyList = ... // convert Array[Point] to PyList // construct args let args = PyTuple::new(1) args .. set(0, points) // construct kwargs let kwargs = PyDict::new() kwargs ..set("color", PyString::from(color)) ...set("width", PyInteger::from(width)) match (try? f.invoke(args~, kwargs~)) { Ok(_) => () _ => { // handle error } } } -
Beware of Dynamism: Always remember that Python is dynamically typed. Any data obtained from Python should be treated as "untrusted" and must undergo strict type checking and validation. Avoid using
unwrapas much as possible; instead, use pattern matching to safely handle all possible cases.
Conclusion
This article has outlined the working principles of python.mbt and demonstrated how to use it to call Python code in MoonBit, whether through pre-wrapped libraries or by interacting directly with Python modules. python.mbt is not just a tool; it represents a fusion philosophy: combining MoonBit's static analysis, high performance, and engineering advantages with Python's vast and mature ecosystem. We hope this article provides developers in the MoonBit and Python communities with a new, more powerful option for building future software.